Changing the Mercedes-Benz 190 Neutral Safety Switch
by John Cacavas
Recently I had a problem with my 1985 190D 2.2 in that the car would occasionally not start in 'P'. If I attempted to turn the engine over, nothing would happen. If I held the key in that position and then, with my other hand, moved the shifter into the 'N' position, the engine would start. More often than not the problem lies in the adjustment of the switch, and so before I went out and bought a new switch, I removed both belly pans and checked the adjustment. The adjustment was fine. I also checked out the shift rod bushings, and the giveaway for bad bushings that one or both is bad is that you have excessive play in the shift lever. Both bushings were fine. This led me to believe the neutral safety switch was bad.
I was unable to find suitable documentation regarding the changing of this switch. I did see an MB transmission manual that illustrated the process for other cars; however, there were several fundamental differences which made for a completely different procedure. The Haynes 190 manual offers a description of the procedure, but didn't answer many of my questions. It took me three trips under the car and one to the Snap-On man to get this switch changed, and hopefully you can benefit from my experience and do it in one.
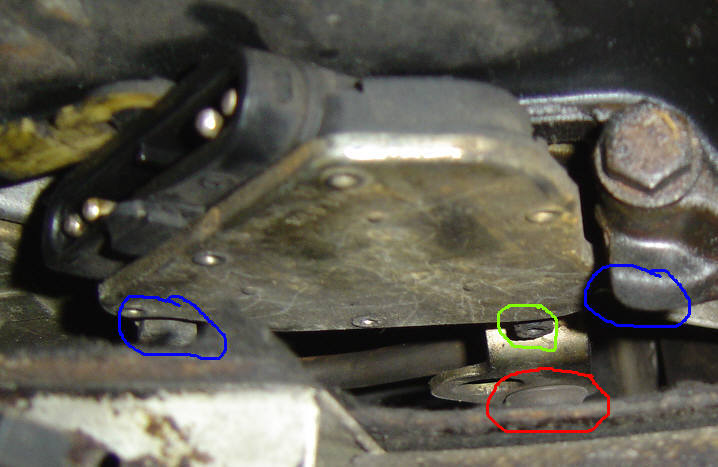
Above is a picture of the old switch as seen if you were to crawl under the car from the drivers side and look up at the side of the transmission. In blue are the mounting bolts; as you can tell only one is visible, and they both have limited clearance within the confines of the transmission tunnel. The green circle shows the adjustment hole, and in red is one of the shift bushings.
As you can see, it is tight in there, and in order to get it out, you are going to need the right tools. A 1/4" socket set is way too big. I paid a visit to the Snap-On man, to see what he could suggest. I came away with a FHOM10A, which is a 10mm flex-head wrench (below). The beauty of this wrench is that it can get to the two bolts with ease. You might be able to find a cheaper substitute but time is money, and if you don't get it right then you will end up taking as many trips under the car as me. Besides, if money gets tight, you can always sell this wrench on eBay.
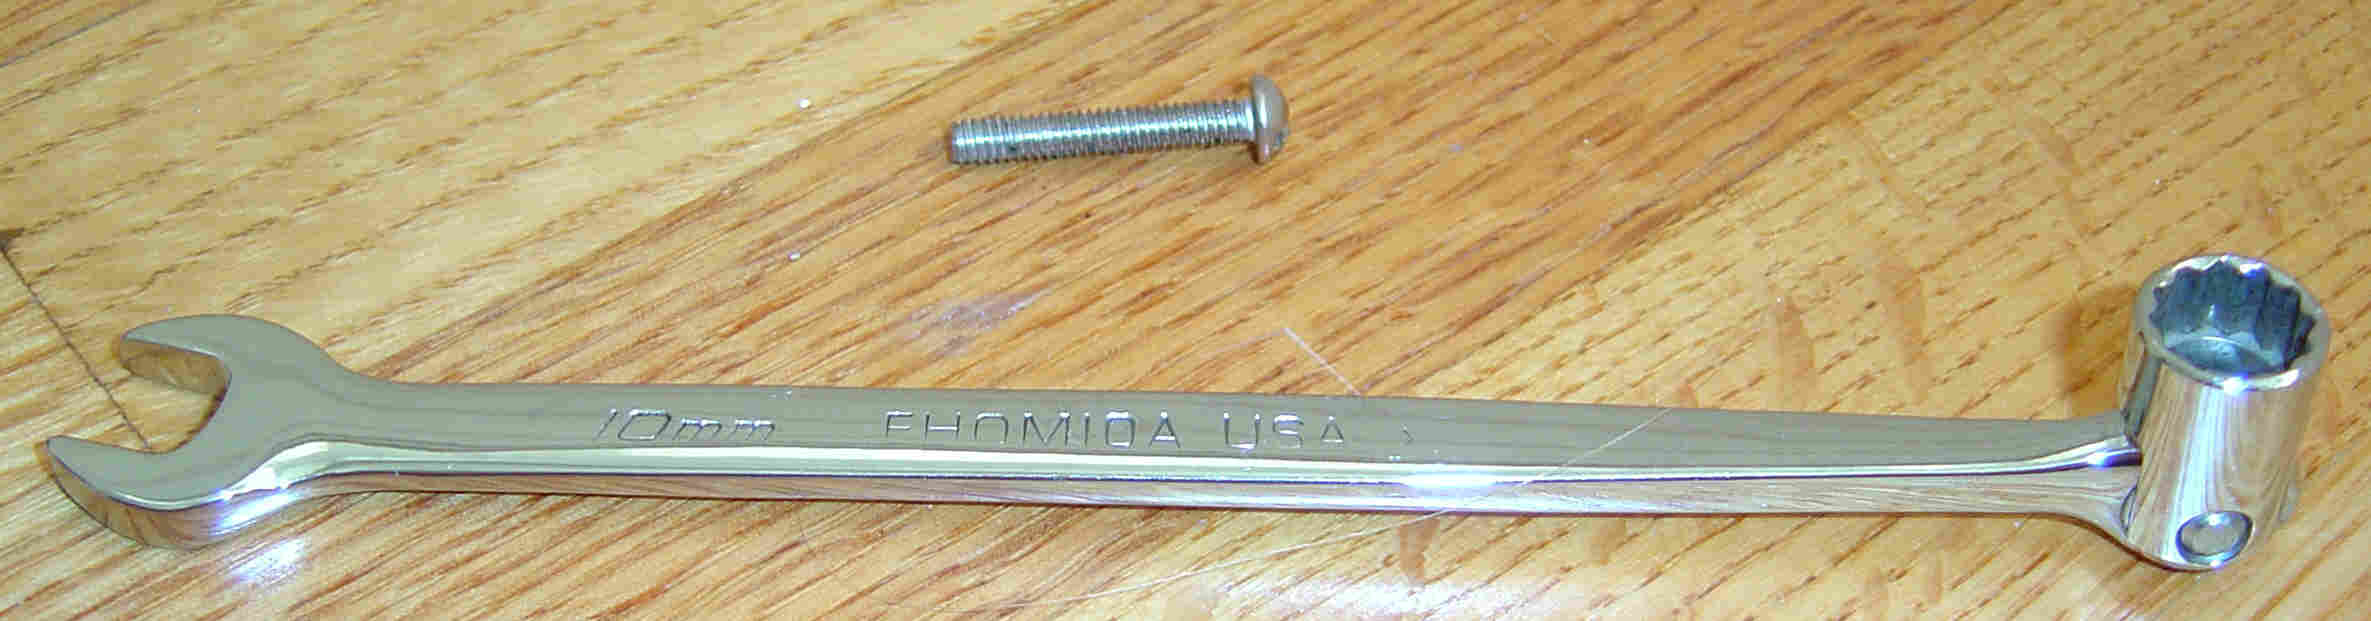
The bolt in the above picture came from my house toolbox and is used to align the switch. Any bolt will do, as long as it fits through both holes on the alignment levers, and is not too long. Mine was an inch long and proved to be an ideal length. On other cars with more room, a drill bit can be used to align the holes, but in the 201 there is not nearly enough clearance for a drill bit.
REMOVING THE OLD SWITCH
If you are having trouble getting the old switch out, then take a cue from the Haynes manual. First, lower and support the exhaust system from the rear, place a jack under the transmission mount, remove the mount bolts and then slowly lower the transmission until the switch bolts are easier accessed. I did not need to do this, but it is an option.
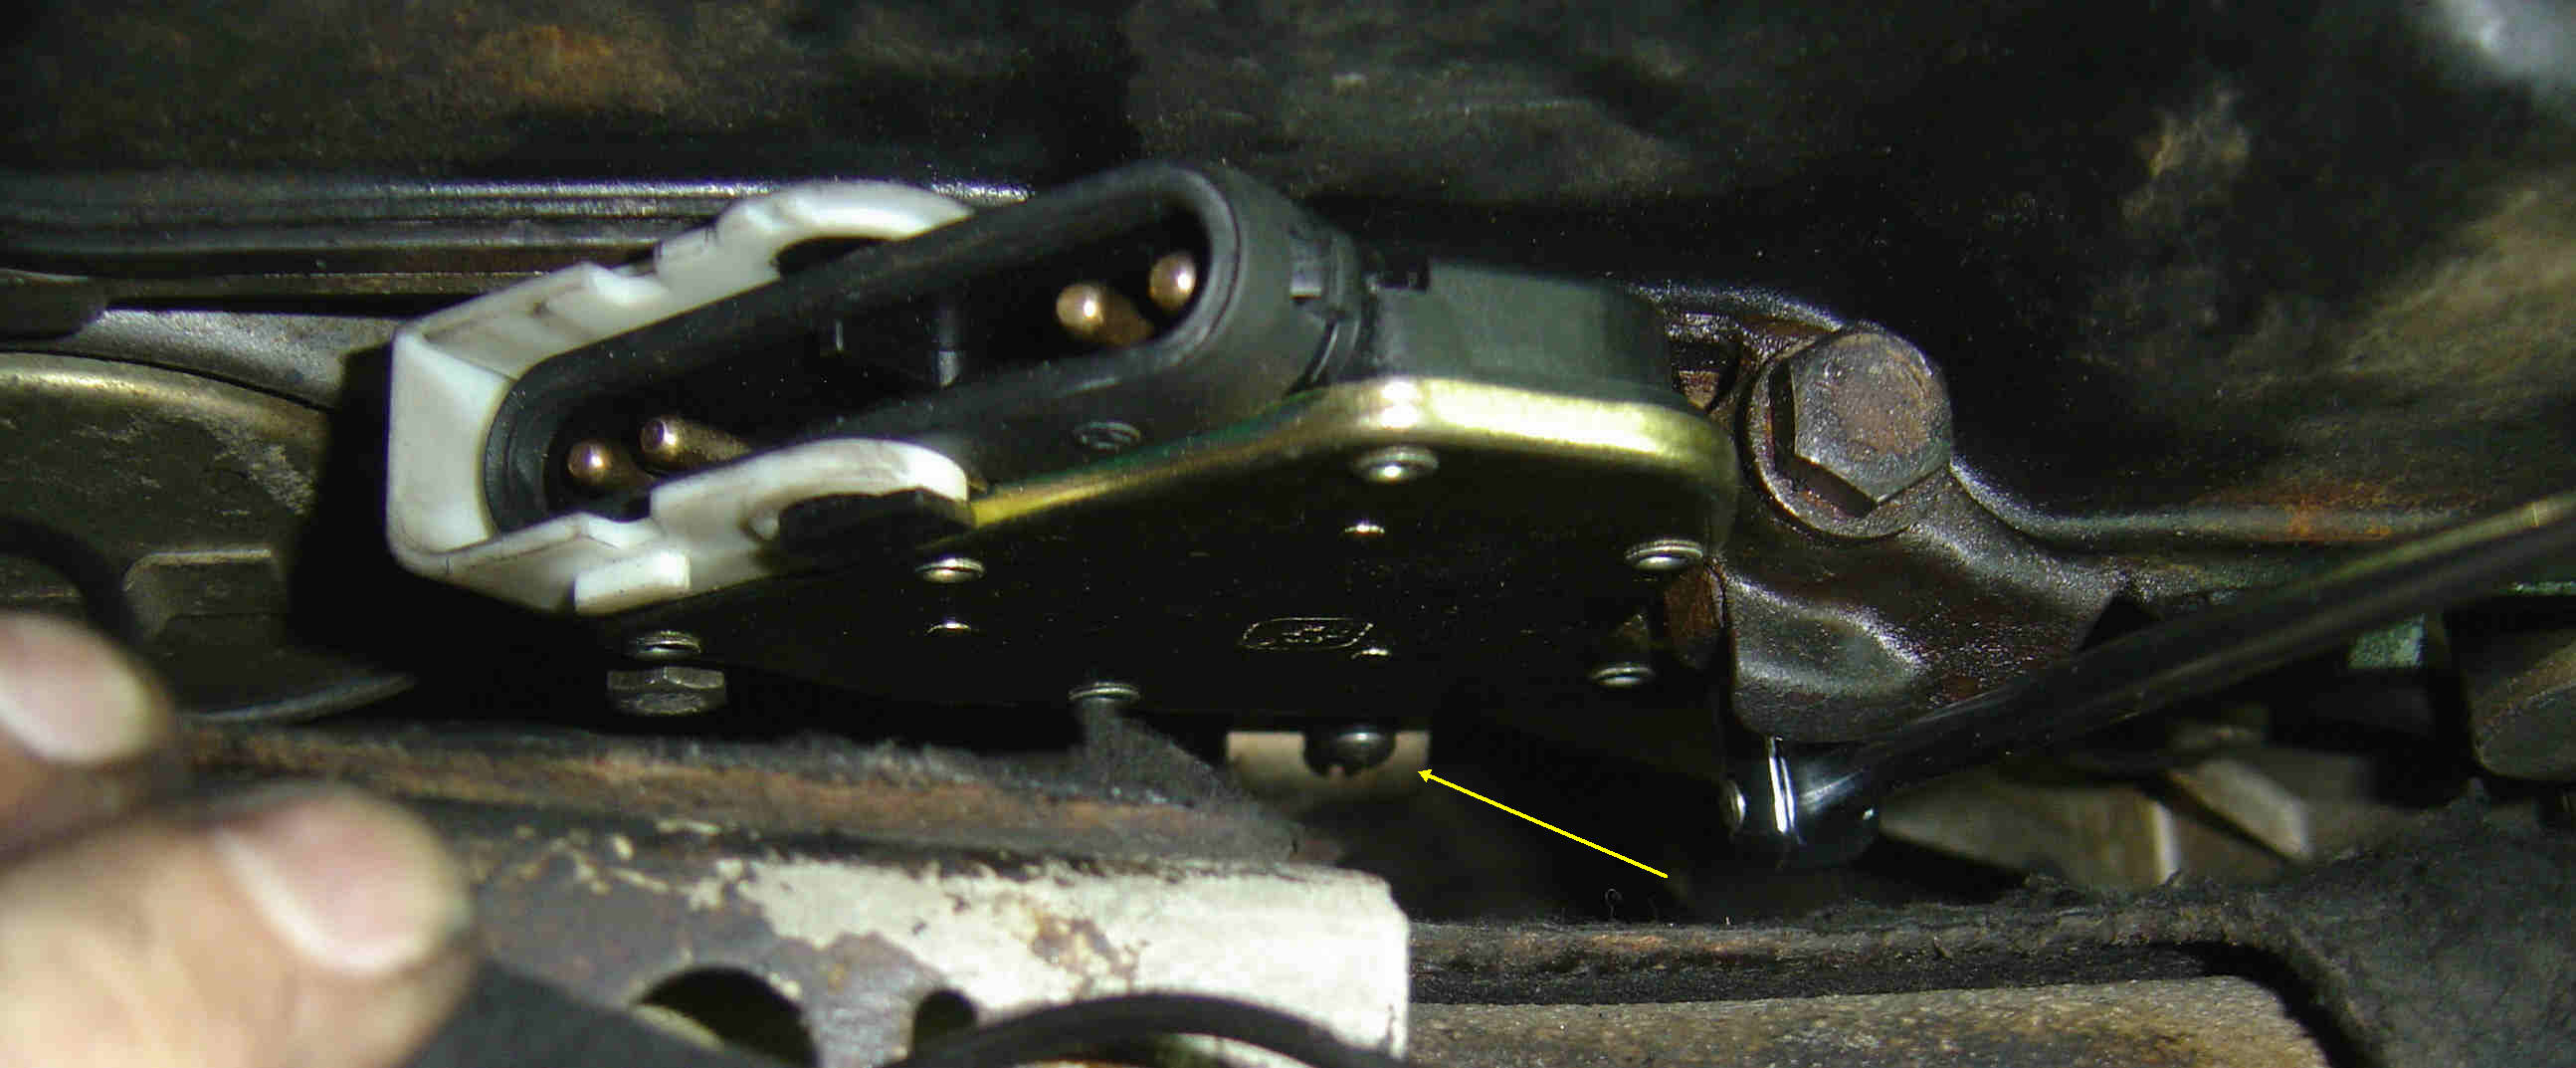
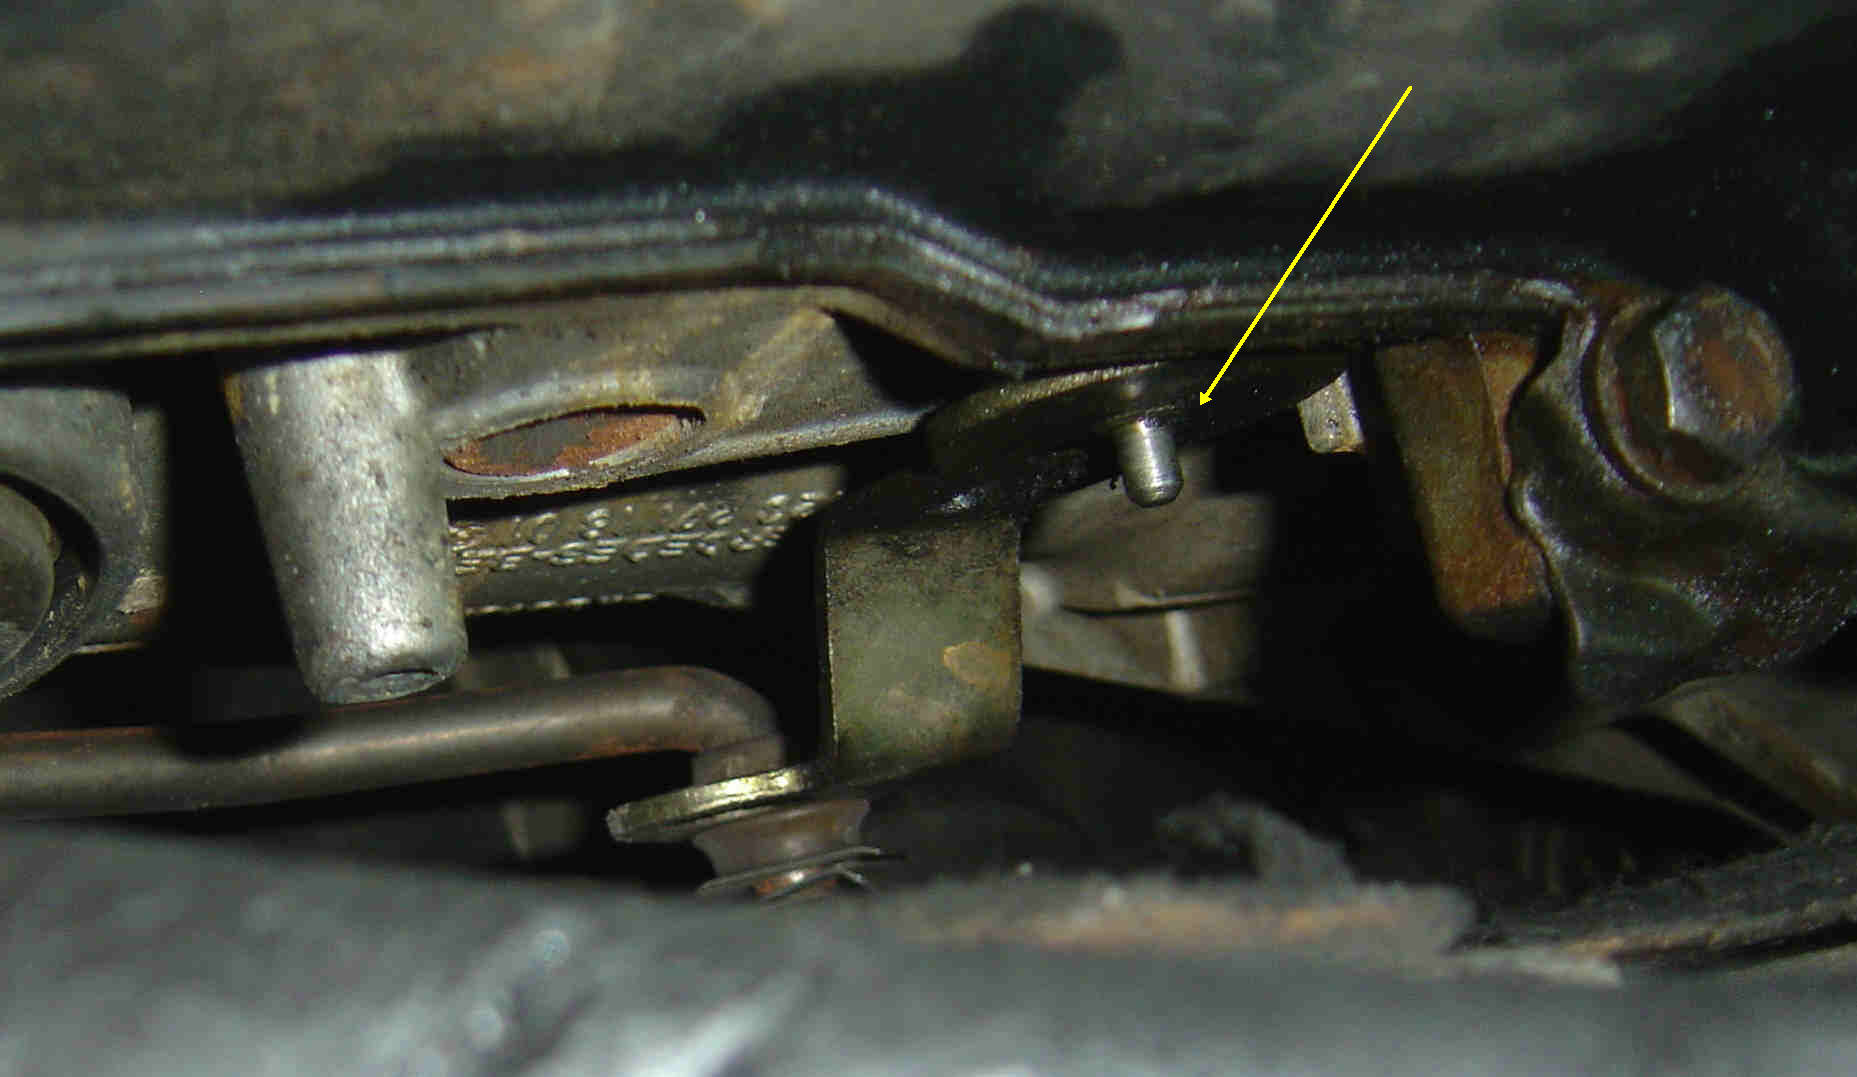
Here is a photo of what the transmission looks like with the switch out. Note the shiny pin that goes into the hole on the NSS (yellow arrow).
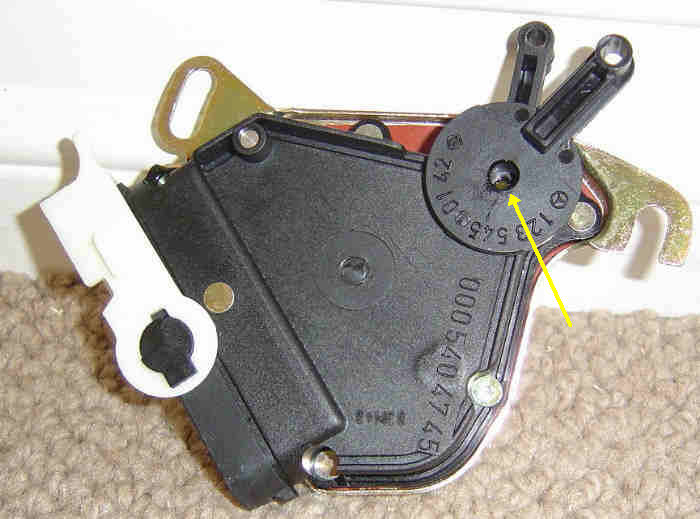
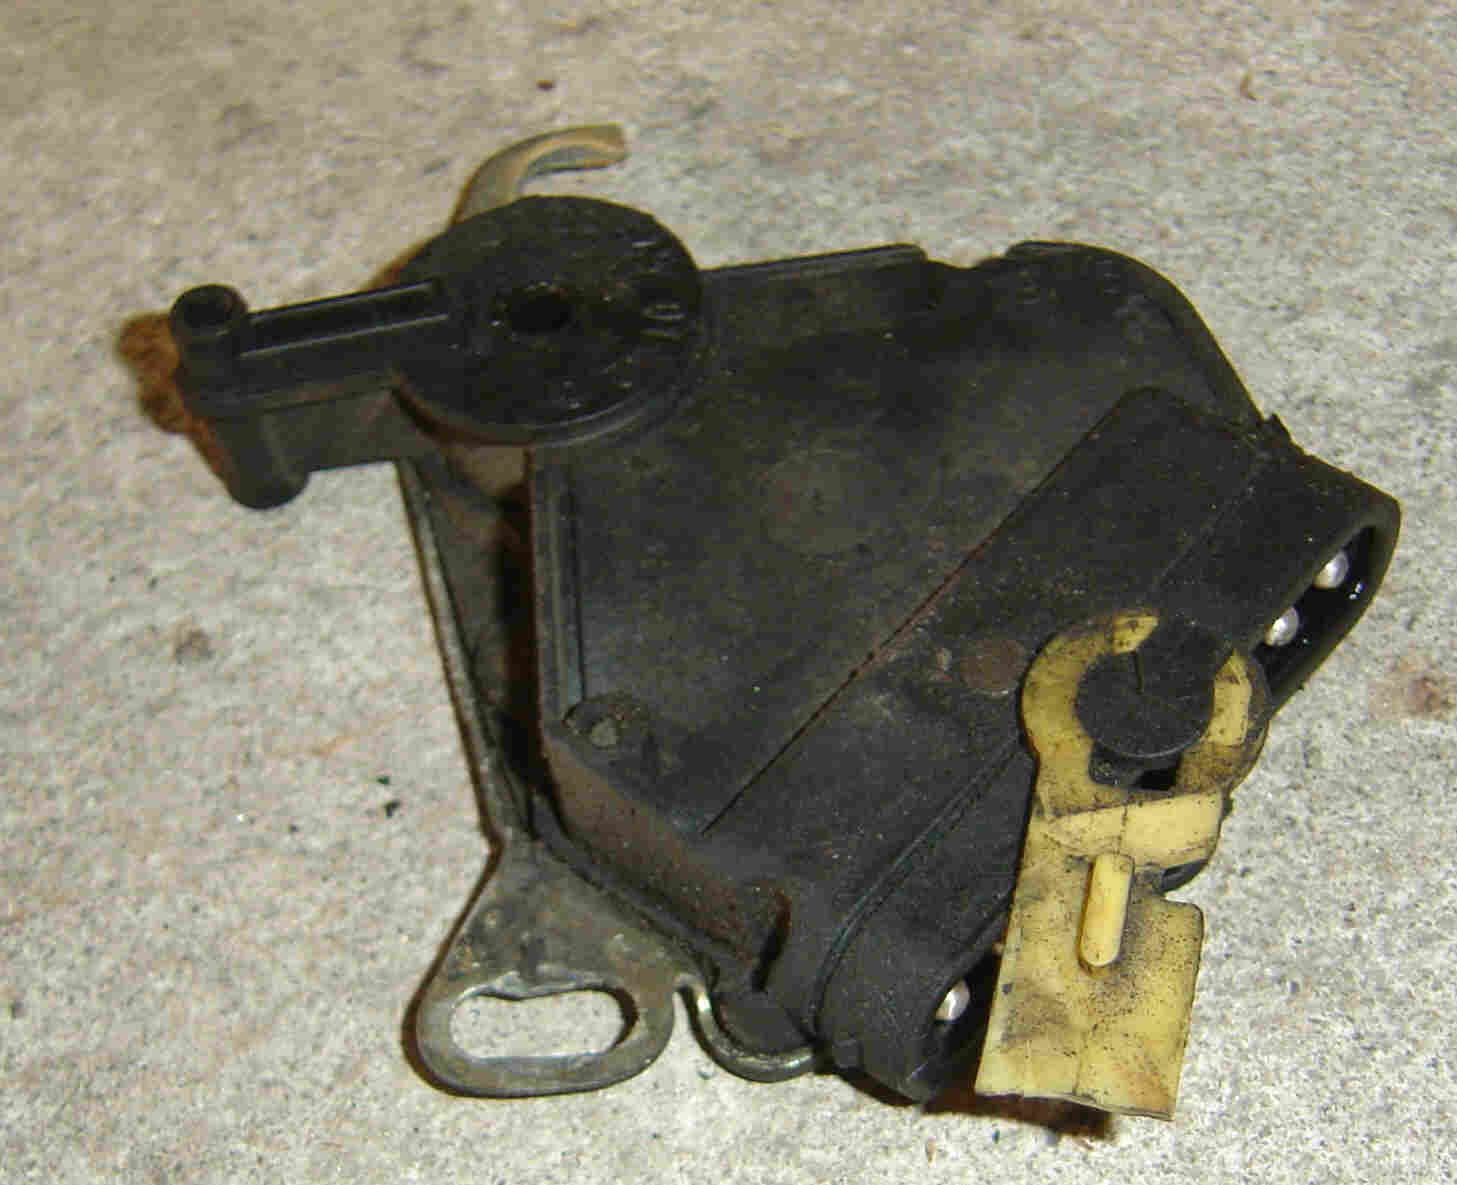
Below is a photo of the old switch. Note the broken white lever which is used to hold the multipin cable in place.
INSTALLATION AND ADJUSTMENT
Below is a photo of the new switch…note the white lever which comes down and locks the electrical connector into place. Also note the hole for the transmission pin (yellow arrow) and the two black plastic alignment holes on the end of the levers.